
Recently we have made an update to our user guide. Please follow this important notice to prolong the life and quality of your Stargate and Stargate platform. Avoid direct exposure to Ultra-Violet light - especially high output UV lights. Too much direct exposure may cause deterioration in the quality and life-expectancy of the Stargate ring, DHD and platform. While your kits are designed for in-tank use and are extremely resilient to the aquatic environment, too much UV exposure is hard on the inner structure and epoxy coated decorations.
Too much UV exposure will void your warranty - determined on a per customer basis. The built-in UV lights included with your kit are not of concern.
Thank you for purchasing your new Stargate Aquarium Tender. This is product is part of an on-going project that shall continue to receive improvements in software (which you will learn to download and install) as well as hardware upgrade features - so check back often for new products. In this user guide, we will walk through the complete use - from unpacking to assembly and ending with software management.
Please follow the instructions, or at least fully read the getting-started guide before operating this product around any open water.
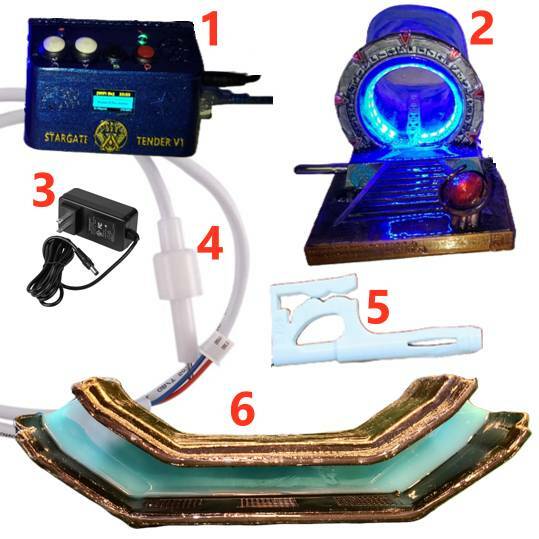
After removing your Aquarium Tender from it's packaging and carefully inspecting it for missing parts or damages - it's time to begin the assembly and installation steps. Be sure to follow these steps in order to ensure no damage caused to the electronics.
Pre-Assembly - Cleaning #1

Pre-Assembly - Cleaning #2

After rinsing, and drying the submersible items in the previous step - open the alcohol wipes and gently clean each of the submersible cables included (4, 2, 5) all have submersible cables. Be careful not to submerge the control box end of the TDS cable (4) as it is not submersible.
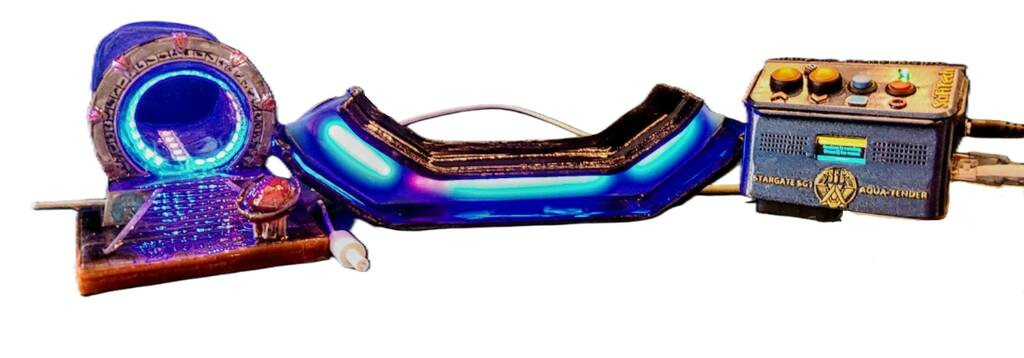
Stargate Command Tank Submerging

Hint: Sometimes placing an aquarium rock beneath the wormhole will help maintain buoyancy in fast moving water.
FishLane v2.x Installation (optional)


Control Box Location

The OLED Control Box for your Aquarium Tender is designed to hang on the top edge of your aquarium. It is a universal fit.
Your OLED Control Box is NOT water-tight or water proof. Avoid water immersion, ingestion or over-spray. The built in lips and canals should assist in random accidental drips.
TDS Sensor Location

With revision 1.3+ of the Aquarium Tender, we now provide the TDS Sensor Probe pre-assembled inside a TPU probe cover. This cover is designed to "clip" into virtually any aquarium, by sliding it over the upper lip of your tank. With most tanks it will lock into the lid lip, with other tanks it will rest cleanly on any glass edge. This TPU cover is designed to protect your fish from the probe ends, to avoid any sharp ends as well as potential of circuit closure by the fish. Do not remove probe from casing to ensure your fish remain protected.
It is best to position your sensor in an area where the water will circulate, with minimal current but not completely still.
The software will begin monitoring your current tank conditions over a period of time and report warnings based on your configured tds sensor range when the average runtime sensor changes dramatically beyond the set range. Every time your controlbox is turned on, tds logs are purged as our goal is to monitor active conditons - not targeted conditions.
Cable Connections

The software preinstalled on your control box is already configured for standard usage. Every-time you make changes to your settings, they are stored locally and available again when restarted. If your settings are not working for you, simply reset settings from the main menu and the pre-configured settings will be restored. Your new Aquarium Tender has SciFiTech software built in-house. We are constantly improving the software - if you have a request for improvement or bug report please email [email protected]
Control Software Introduction

Upon completion of the getting-started steps. Your new Aquarium Tender is ready to operate. Simply press the Power button to turn it on. Once the main board powers-up, the Power led will illuminate. The Message led is used to notify of alerts or user input requests.
Your screen is laid out with the common UI shown here.
Main Menu

The Button is a state-locking switch, which when used initially will open the [Main Menu]. When interacting with a menu or a user prompt the Button will double as an "Enter" key.
The / up/down buttons will guide your through menus and user interaction screens. Menu items with a *, represent an additional menu as opposed to an action.
The main menu includes (may change). Move / or press to enter a menu/action item.
RGB and LED Menus

Most RGB and LED Lighting menus contain similar menu options. Each menu is specific to the available options of that particular set of LED Lights. Not all are the same.
WiFi Menu

The first thing you should do when setting up your Aquarium Tender is to configure your WiFi Settings.
Step #1: Activate and Configure WiFi

To fully enable all features of your Aquarium Tender - we encourage configuring your wifi connection. Follow these steps.
Step 2: Check for Updates


Every so often we will publish a new software update for your device. These updates are very important for you to experience the full effect of your product as well as maintain efficiency.
Step 3: FishLane LEDs

If you have received a FishLane v2.x fish tunnel with your package (or are adding one to an existing package), you need to tell your Control Box how many LEDs the tunnel has.
Hint: If you do not press any button for 1 full minute, the Control Panel will automatically exit the menus and return to normal operation.
Step 4: Active Time Selection

It is very important that fish do not have active lighting on 24 hours a day. They require a normal day-night cycle just like all living beings. The main purpose of your device having WiFi is for this feature.
Step 5: Tie DHD/Chevron lighting to Gate Activity

The LED Lighting for your Stargate platform accessories such as the DHD, Chevrons can be individually attached to the activity time manager associated with the Stargate. If [Tie To Gate] is enabled, the led lights will turn on/turn off in accordance with the user-selected active time of the Stargate's main rgb lights.
Step 6: Select Temperature Scale/Unit of Measurement


Depending on where you are located, in the world - the unit of measurements may differ. Your Control Box is configured to provide either Celsius (Canada, UK, Europe) or Fahrenheit (USA).
Step 7: Select Temperature Scale/Unit of Measurement
Depending on where you are located, in the world - the unit of measurements may differ. Your Control Box is configured to provide either Celsius (Canada, UK, Europe) or Fahrenheit (USA).
Step 8: Set Target Temperature and Range


Your Aquarium Tender temperature sensor provides the ability to monitor your tanks water temperature, set the target temperature your fish require and then provide warnings if that temperature reads higher or lower than the allowable range.
Hint: When your water temperature has drifted above or below the target range provided, your Stargate will periodically glow solid Red, Yellow, Cyan or Orange. The control box's messaging LED will begin flashing. These sequences will continue to repeat every 5-15 minutes at a time until the temperature is returned to normal.
Step 9: Set Target TDS Range

The TDS Sensor included with your Aquarium Tender is configured, via software, to auto-range after the first 7-15 minutes of runtime. Each time you reset/power cycle your Control Box, the TDS Sensor will re-adjust it's calibration and begin auto-ranging again. A good use for this is when you change the water in your tank or after doing a tank cleaning, to avoid warning alarms.
Hint: When the sensor determins that TDS values have exceeded the allowed range, your Stargate will glow Cyan for LOW and Red for High - along with the flashing message LED on the control panel. This will continue until either a) you power cycle the control box or b) the levels return back to an allowable range.